About X-Stitch and Computers
Embroidery has existed as a pastime, arguably as far back as Norman times, (if not earlier). Cross stitch itself seems to have originated in Europe around the 1500s , and gained popularity since then. It has only been within the last 15 years that technology has improved to a degree where a device in the home can lend a hand.
Yes - we are talking about the computer, (no stranger to a Web browser) but until only fairly recently, even the mention of the word would have been enough to cause many a talented stitcher to vanish into the distance. Times have changed, however, and, every day, more households are becoming home to machines hundreds of times more powerful than those that sent the Apollo missions into space. The main use of these computers in the home, however, is all too often only to play games or type letters, and far too many are used only by the men or children in the family. No-one now doubts that the Age of Computers has arrived in the world of cross stitch and needlecraft, because, armed with the computer programs that are now available, you can use a computer to save enormous amounts of time and effort when designing new charts of your own.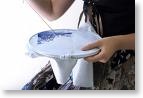
How can a computer help?
Conventionally, cross stitch design work is carried out on graph paper, with coloured pencils. You colour in the squares, making the odd mistake here and there, rubbing out, copying, and making sure not to spill coffee over your masterpieces. After some time, the design is complete. Next, it needs to be 'converted' into black & white symbols, in a grid, where each symbol uniquely represents a colour. So, its back to pen and paper, rubbing out, carefully drawing, outlining, and so on, until the chart is done. This is followed by a stitching session, possibly followed by another drawing bout, to correct some minor problems. All of this takes time, and for most people, it is only the design of the original colour pattern that counts as 'fun'. The process of converting to symbols is boring, takes ages, and is prone to mistakes, adding possibly weeks to the job.
Ursa Software's Programs
Today,there are 2 key types of computers in the home: those which use Windows, and those which are Macs


The MacStitch, WinStitch programs, by Ursa Software, handle most of the hard work for you, leaving you to concentrate upon the creative aspects, and letting the computer do the drudge. To maintain a familiar analogy, the computer screen is presented as a grid, exactly as if you were working on graph paper. Instead of coloured pencils, a selection of colours, representing DMC or other thread colours, is shown on screen, and you can 'pick up' a colour for drawing with the computer's mouse, just as you would pick up a pencil.
Using the mouse as your drawing tool, you then start filling in squares, drawing full, or half stitches, and changing colour when you need to. On graph paper, you might lean closer for a tricky area - on the computer, you can 'zoom in' or 'zoom out' to make the on-screen squares larger or smaller - great if your eyes aren't what they once were!
Of course, it would not be much of an advantage if it stopped there. Using the computer, you can quickly copy areas, and stamp them back down elsewhere, to build up borders and the like. You can rotate areas, draw boxes, circles, and fill large areas with colour in a few seconds. You can add outlining stitches, and a clever automatic outliner will go round the edges of a shape, adding outlining for you.
The real time saver, however, is when it is time to create the symbolic chart for others to work from. Instead of spending a week or two doing it by hand, a simple click or two of the mouse kicks the computer into action, and in just a few minutes, you have a clear, easy to read chart, with no mistakes, and all the stitches counted, too!
Can't Draw?
People who can't draw need not despair - it is amazing what can be achieved with a piece of clear plastic and a felt tipped pen! Place the clear plastic over an image, and trace the main outlines in black felt tip. Then sticky tape the plastic to the front of your computer screen, and use the mouse to copy BEHIND the plastic and recreate the outline. Then colour it in!
The new ‘Onion Skin’ feature (named after a technique used by cartoon animators), lets you place a picture or drawing behind the on-screen grid, and allows you to draw over it. Once finished, you remove the underlaid image.
Our programs allow easy 'import' of scanned pictures. Our Windows programs can actually drive the scanner directly, before converting it into a unique chart for you in seconds.
(Scanners are a device like a photocopier, which, instead of creating a new piece of paper, place an image digitally into your computer. The scanned image is made up of thousands of coloured dots, which the X-Stitch programs shrink down to a smaller size, and turn into a cross stitch chart for you!)
What do I need to get started?
You need a computer, a mouse, a colour screen, and a printer.
Hardware requirements:
PC compatible running WINDOWS - requires Windows can print to any graphic printer supported by Windows, in black & white or colour, stitched view, or symbol. Requires 60Mb disc space for the program, and a hi-colour display.
Mac running recent versions of OSX.
About the programs in general...
All of our programs have these main functions in common: They...
• Allow you to create a x-stitch design by 'drawing' on the screen with the mouse.
• Allow you to re-use parts of one design in a new one.
• Allow you to print these designs as an easy to follow chart, on your own printer
• Allow you to import pictures from other sources, and use these as designs.
The program does away with the need to design on paper with coloured pencils (avoiding much of the associated time, effort, and rubbing-out involved), and then takes away the tedious job of turning coloured squares into clear, accurate, symbols, producing your chart in minutes instead of days.
Is it easy to use?
We believe so, and so do our happy customers!
If you, or someone helping you, can use a computer to some degree, then the time taken to 'learn' our program will be short.
No program can honestly claim to be usable by people with 'no computer experience' . However, we write our programs with the novice user in mind, and we listen to customer's opinions for improvements.
"Thanks ever so much for updating your program
.. so quickly .. the printout is fantastic, as is the program.
Many congratulations on creating such a great
program for such a small amount of money." -
Sarah Doe
How do you draw on a computer?
All our programs are 'driven' by using a mouse. We have found this to be the most natural way of working with a program such as ours, as it mimics your hand movements on screen. (We have avoided the use of the keyboard as much as possible.) Under the control of the mouse, you move a pointer around the screen, and you can 'draw' by pressing a button on the mouse whilst you move. Wherever the mouse button is pressed, while working on the magnified grid - the screen equivalent of graph paper - a coloured square appears. The drawing area of all of our programs is up to 1000 x 1000. Thats about 6 feet square of 14 hpi cloth!
For those who feel less than artistic, sample pictures are supplied on the discs, and you can always use a favourite piece of clip-art!
"...thank you for the help you gave me in getting started ..
it has given me many hours of pleasure and I really enjoy using it ...
I can't draw to save my life.. very pleased with the results.
The only problem is now I have to find time to sew them..."
- Carolyn Hollet
So how would I create a new design?
• Start with a blank screen or grid.
• Define the colour of the threads you want to use.
• Assign symbols to each colour - a blank is used for cloth areas.
• Draw your design on screen , using the mouse, or import a picture from elsewhere.
• Choose a chart area.
• Print the chart.
"...Neil, who knows a great deal about computers,
thought it an excellent program. I, who am a complete computer dummy,
found it very easy to use, and absolutely fascinating.
All I need now is the time!"
-Mrs B Goulder
Can I scan pictures or use digital photos?
All our programs are designed to allow you to use standard pictures for whichever machine you are using—(The windows program scans directly using your scanner), and also imports BMP, PCX, TGA, DIB, PNG, JPG images
Digital pictures, tend to be over-large, or have too many colours, to be used unchanged in the programs.
For instance, 1000 pixels translated directly into stitches would give you a chart the size of a wall! But digital photos are usually much bigger than even this. In such cases, you usually need to 'process' the images to make them smaller, or less colourful (16 or 32 colours instead of 256 for instance). This processing is done in the import stage of the programs. Reducing colour and size to get the image down to (e.g.) 100 x 100 dots (about 7 inches square on 14HPI),and using (e.g.) 30 colours, must lose detail from the original, and this can disappoint some people. Especially when a carefully scanned picture of 14 people outside a church turns into a jumbled mass of pink and brown blobs.!
The fact is, in order to reduce a scanned picture that is merely 1000 pixels across, down to a cross stitch pattern which has only 100 stitches across, you need to effectively 'throw away' 99 out of every 100 pixels from the original.
Our programs import scanned pictures with a clarity and speed equal to, and often better than, programs costing many times more!